Last Updated on 13.09.2026 by DriverNew
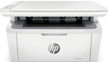 For the HP LaserJet MFP M139a, you can use the full HP Easy Start installation package for Windows 11, Windows 10, Windows 7. It includes the print driver, scanner driver, and HP Scan software, so HP Smart or HP app is not required for normal printing and local scanning via USB.
If the driver is being installed for the first time
If this is the first installation of HP LaserJet MFP M139a on this computer and the MFP has not previously been connected via USB, go directly to the “Installing printer and scanner drivers” section.
Removing a previous installation if problems occur
This step is required only if the MFP has already been connected to the computer and the previous installation ended with an error, the printer is detected incorrectly, or the scanner does not work.
Windows 11
- Disconnect the MFP USB cable from the computer.
- Open “Settings → Bluetooth & devices → Printers & scanners”.
- Select HP LaserJet MFP M139-M142 and remove it. Windows and HP software may use this series name for the M139a model.
- Open “Settings → Apps → Installed apps”.
- If HP software related to HP LaserJet MFP M139-M142 is listed, uninstall it.
- Restart the computer.
Windows 10
- Disconnect the MFP USB cable from the computer.
- Open “Settings → Devices → Printers & scanners”.
- Select HP LaserJet MFP M139-M142 and click “Remove device”.
- Open “Settings → Apps → Apps & features”.
- If HP software related to HP LaserJet MFP M139-M142 is listed, uninstall it.
- Restart the computer.
Additional removal of the old driver
If the problem persists after normal removal, you can also remove the remaining driver package.
- Press Win + R.
- Enter
printui /s /t2and press Enter. - Open the “Drivers” tab.
- Find the driver related to HP LaserJet MFP M139-M142.
- If the driver is present and no longer in use, select it and click “Remove”.
- If Windows offers a choice, use “Remove driver and driver package”.
- Restart the computer.
Installing printer and scanner drivers in Windows 11 and Windows 10
The following installation package is used for HP LaserJet MFP M139a:
HPEasyStart-13.6.5-LJM139-M142_U_54_3_5248_1_Webpack.exe
Step 1: Launch HP Easy Start
- Turn on HP LaserJet MFP M139a.
- Do not connect the USB cable to the computer yet.
- Double-click the downloaded HPEasyStart-13.6.5-LJM139-M142_U_54_3_5248_1_Webpack.exe file.
- If Windows asks for permission to make changes, confirm the launch.
- Wait while the installation files are extracted and HP Easy Start opens.
Step 2: Start the installation
- On the “Welcome to HP Easy Start” screen, click “Continue”.
- On the next screen, the software will ask whether you want to allow usage data to be sent to HP.
- It is recommended to select “No”. Sending this data is not required for driver installation or MFP operation. This also reduces optional network traffic, which may be useful with a slow, unstable, or limited internet connection.
Step 3: Proceed to connection selection
HP Easy Start will try to find the MFP. Because the USB cable is not connected yet, the software may display the message “Printer not found — let’s try another way!”.
- Make sure HP LaserJet MFP M139a is turned on.
- Leave the USB cable disconnected from the computer.
- Click “Continue”.
Step 4: Select USB connection
On the next screen, HP Easy Start will ask you to select a connection method.
- Select “USB cable (USB cable required for printer)”.
- Click “Continue”.
Step 5: Connect the USB cable
After selecting the connection method, the “Connect printer using USB” screen will appear.
- Connect the square end of the USB cable to the USB port on the back of the MFP.
- Connect the flat end of the cable to an available USB port on the computer.
- For the initial installation, it is recommended to connect the MFP directly to the computer, without a USB hub, docking station, or extension cable.
- Wait while HP Easy Start detects the device and continues the installation.
Step 6: Install drivers and software
After HP LaserJet MFP M139a is detected, the software will continue installing the required components.
The installation package contains the print driver, WIA and TWAIN scanning components, and HP Scan software. Therefore, HP Smart or HP app is not required for normal printing and local scanning via USB.
- Follow the installer messages.
- If the software asks you to select the software components, choose the option that includes printing and scanning functions.
- Do not disconnect the MFP or USB cable during installation.
- Wait for the installation completion message.
Step 7: Check printing
After the installation is complete, make sure Windows detects the MFP correctly.
Windows 11
- Open “Settings → Bluetooth & devices → Printers & scanners”.
- Make sure the HP device is listed. It may appear under the series name HP LaserJet MFP M139-M142.
- Open the device and perform a test print, or print any document.
Windows 10
- Open “Settings → Devices → Printers & scanners”.
- Make sure the HP device is listed. It may appear under the series name HP LaserJet MFP M139-M142.
- Perform a test print or print any document.
How to scan using HP Scan
The installation package contains HP Scan, which is intended for local scanning. You do not need to install HP Smart or HP app to use it.
- Open the “Start” menu.
- Search for HP Scan.
- Launch the program found in the search results.
- Place the document on the scanner glass.
- Select the required scanning settings.
- Scan the document and save the resulting file.
Scanning using a Windows app
The installed WIA driver allows compatible Windows apps to be used for scanning.
- Open the “Start” menu and find the “Windows Scan” app.
- If the app is not installed, it can be installed from Microsoft Store.
- Launch the app.
- Select HP LaserJet MFP M139a or the device displayed under the HP LaserJet MFP M139-M142 series name.
- Perform a test scan.
HP Easy Start does not detect the MFP after USB connection
If you connected the cable after the connection screen appeared, but HP LaserJet MFP M139a is not detected:
- Make sure the MFP is turned on and in a ready state.
- Disconnect the USB cable from the computer and reconnect it.
- Try another USB port on the computer.
- Connect the MFP directly to the computer, without a USB hub or docking station.
- If possible, try another known-good USB cable.
- If other HP printers are connected to the computer, temporarily disconnect them during the initial installation.
- If the device was previously installed, remove the previous installation, restart the computer, and repeat the procedure.
The printer works, but the scanner is not detected
If printing works but HP Scan or another app reports that the scanner was not found, first check the USB connection and the Windows Image Acquisition (WIA) service.
- Make sure the USB cable is connected directly to the computer and the MFP is turned on.
- Press Win + R.
- Enter
services.mscand press Enter. - Find the “Windows Image Acquisition (WIA)” service.
- Make sure the service is not disabled.
- If the service is stopped, start it.
- If the service is already running, you can restart it.
- Then launch HP Scan again and try scanning.
If only printing is available after installation
If HP LaserJet MFP M139a is detected and prints, but HP Scan is missing or the scanner does not work, the scanning software components may have been installed incorrectly or incompletely.
- Disconnect the MFP USB cable from the computer.
- Remove the previous installation as described above.
- Restart the computer.
- Run HPEasyStart-13.6.5-LJM139-M142_U_54_3_5248_1_Webpack.exe again.
- Do not connect the USB cable during the initial device search.
- After the message that the printer was not found appears, click “Continue”.
- Select “USB cable (USB cable required for printer)”.
- Connect the cable only after the “Connect printer using USB” screen appears.
- Complete the installation of all offered printing and scanning components.
- After installation, check again for HP Scan and test the scanner.
If HP Scan does not start
If HP Scan is installed but an error appears when you launch it:
- Restart the computer and the MFP.
- Disconnect the USB cable and reconnect it.
- Try another USB port.
- Check the Windows Image Acquisition (WIA) service as described above.
- Test the scanner using the “Windows Scan” app in Windows.
- If scanning does not work in any application, remove the previous installation and reinstall the HP Easy Start package.



Leave a Reply