Last Updated on 30.10.2025 by DriverNew
If you have downloaded a driver file but are unable to install it because the .exe file is missing (such as setup.exe or install.msi), you can install the driver manually using the .INF file.
Some manufacturers of printers, scanners, monitors, and other computer devices do not create a setup.exe installation file. In this case, open the downloaded file that should contain the driver and use the .INF file to install. In this article, we will tell and show you how to install a driver using an .INF file.
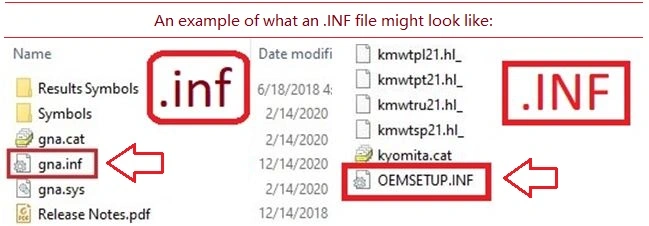
An example of what an .INF file might look like:
How to install the driver: Right-click the INF file and select ‘Install’. Select ‘Yes’ to the User Account Control warning.
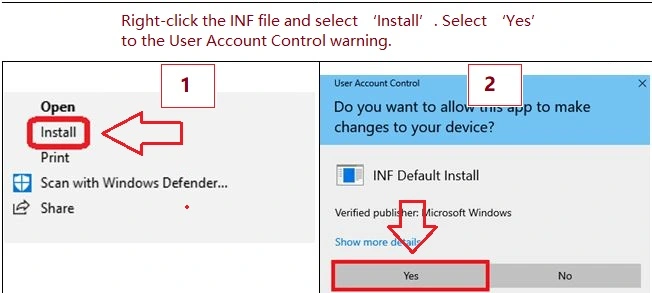
A message will appear on the monitor screen: “The operation completed successfully”.
If you don’t see file name extensions (.INF) when you view files in File Explorer
For Windows 10 operating system: If you don’t see the file extension (.inf): 1. In File Explorer, select “View” on the menu bar. 2. Click to enable “File Name Extensions”. For Windows 11 operating system: If you don’t see file name extensions (.INF) when you view files in File Explorer: In the search box on the taskbar, type file explorer, and in the search results, select File Explorer. In File Explorer, select View → Show → File name extensions.
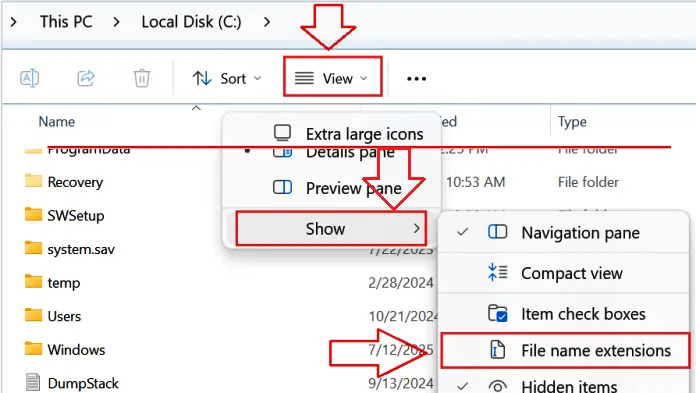
Right-clicking on the .INF file to “Install” may add files to Windows, but often does not associate the driver with the correct USB virtual port in Windows. Therefore, it is recommended to use another method, namely installing the driver using “Have Disk”. This method configures everything correctly in one pass and is the most reliable approach to installing the driver.
Recommended method for installing the driver in Windows using “Have Disk”
Connect and power on the printer
Plug the printer into your PC with USB. Turn the printer On and wait ~10–20 seconds.
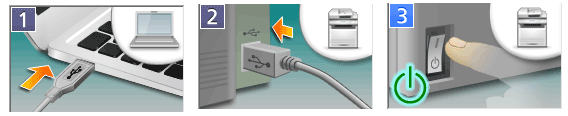
If Windows shows “Driver unavailable,” continue — the steps below will fix it.
Open the classic Add-Printer wizard
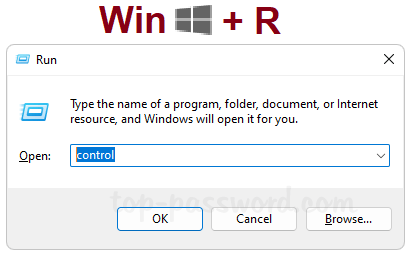
Press Win + R, type control, press Enter to open Control Panel.
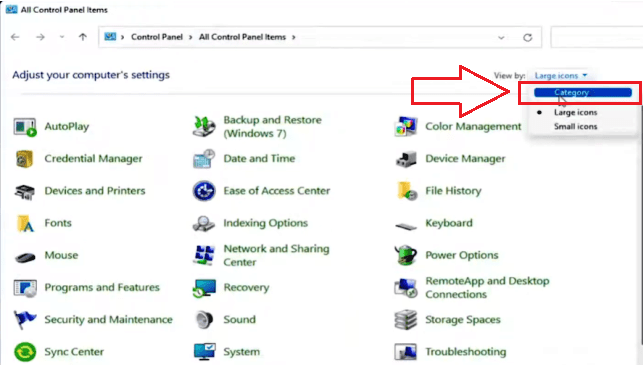
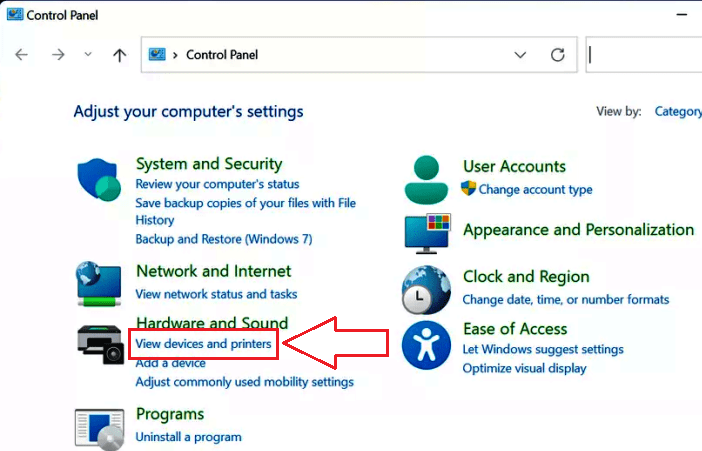
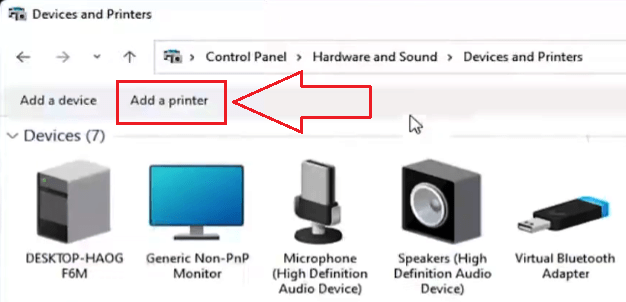
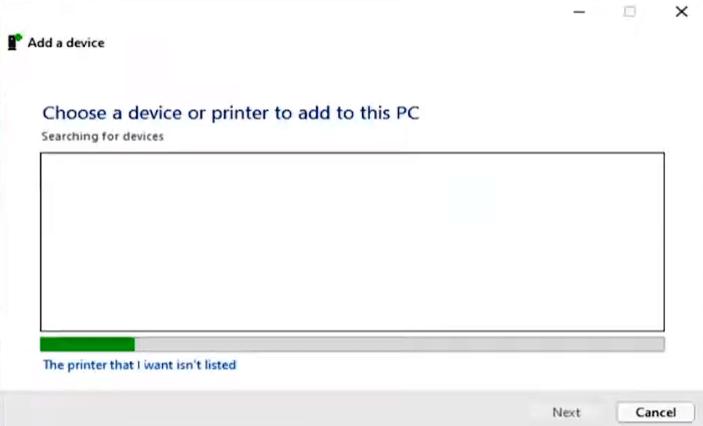
Go to Hardware and Sound → Devices and Printers. Click Add a printer.
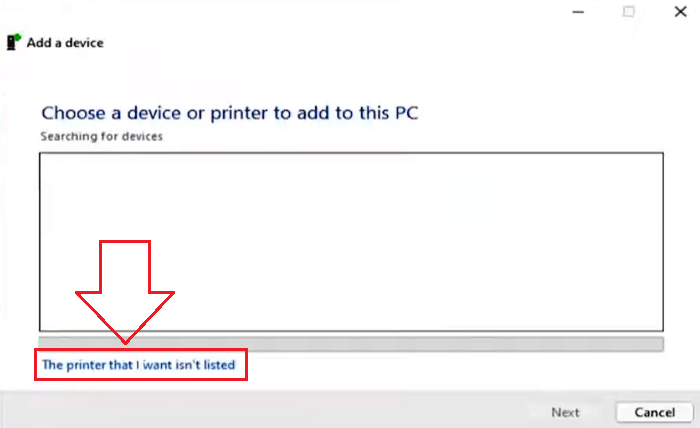
If your printer isn’t listed, click The printer that I want isn’t listed.
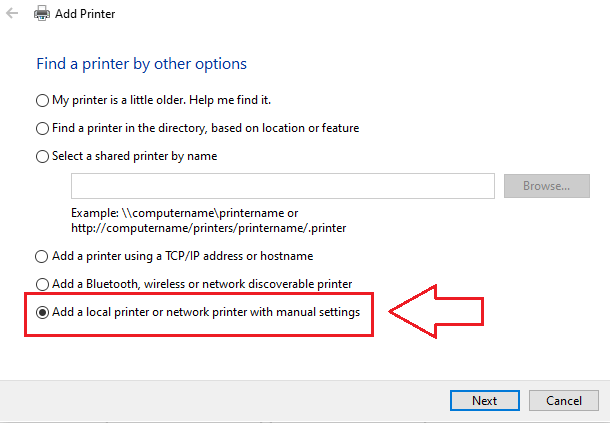
Choose manual setup
Select Add a local printer or network printer with manual settings → Next.
On Choose a printer port, select Use an existing port → pick USB001 (Virtual printer port for USB) → Next.
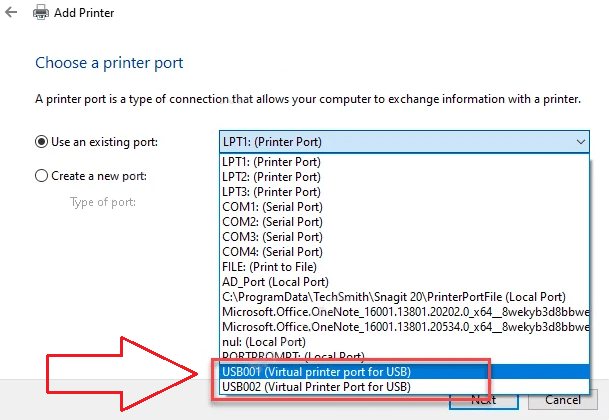
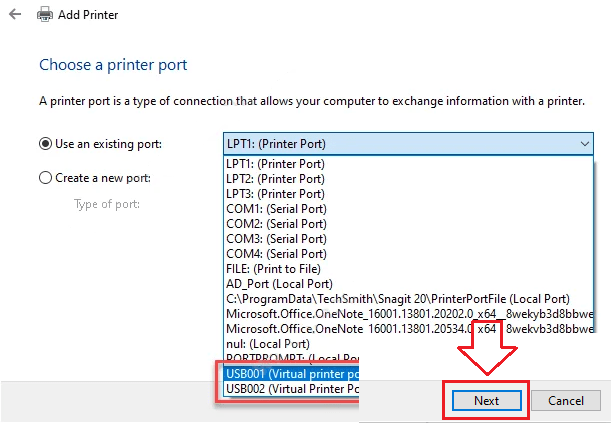
(If printing doesn’t work later, you can switch to USB002 in Printer Properties → Ports.)
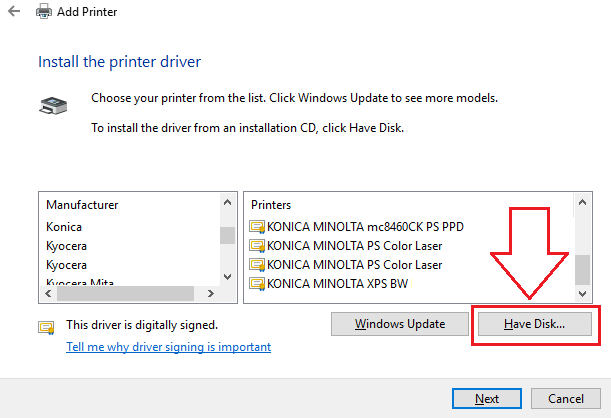
5) Install the Canon driver with Have Disk
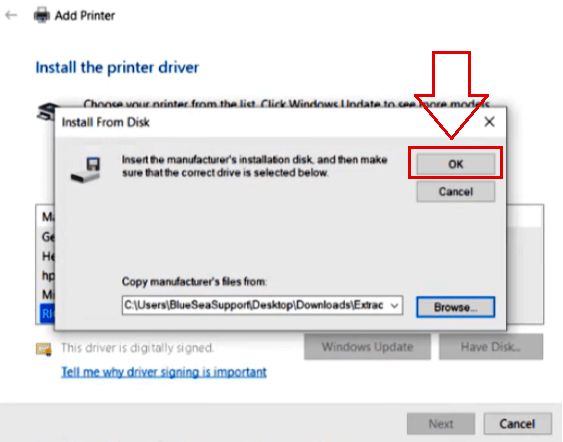
On Install the printer driver, click Have Disk… → Browse….
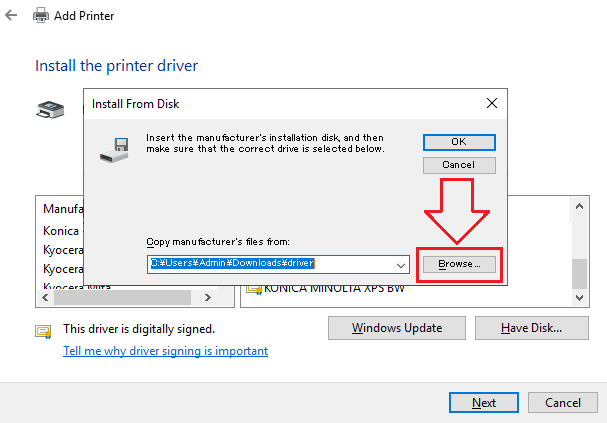
Navigate to the extracted folder and select: …123.INF → Open → OK.
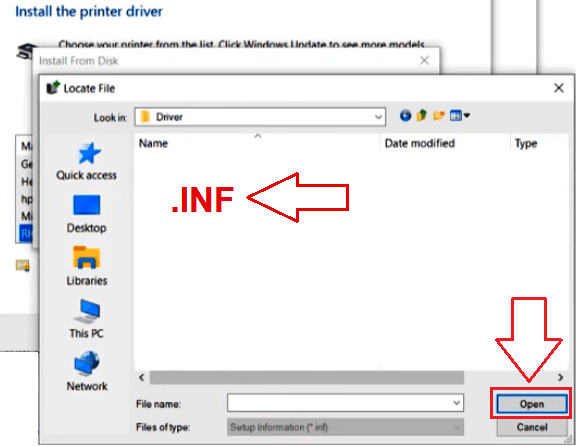
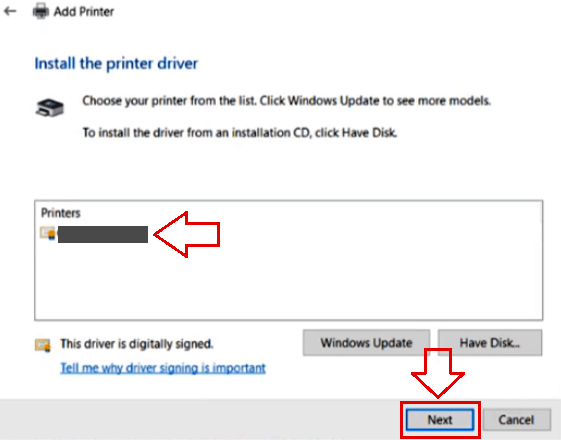
Select (file name) when it appears → Next.
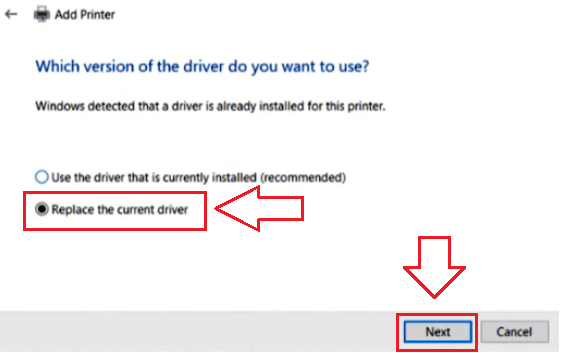
If asked to replace an existing driver, choose Replace the current driver → Next.
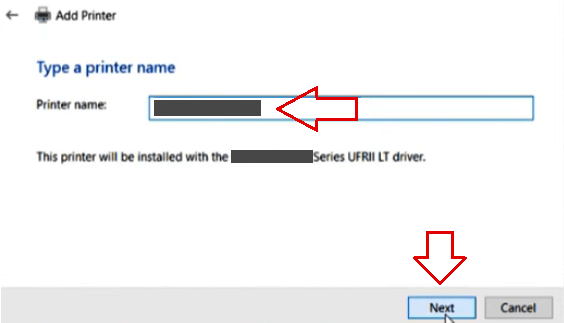
Name the printer (write any name) → Next → Finish.

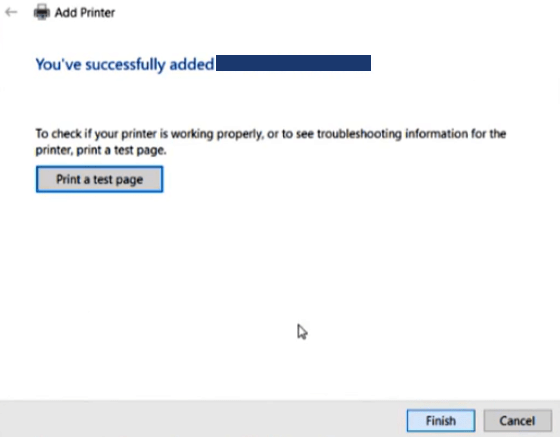
Right-click your new printer → Printer properties → Print Test Page.
This video shows you how to install a device driver manually using “Have Disk” in the Windows operating system.
Quick fixes (only if it doesn’t print first try)
No print / “Offline”:
Right-click the printer → Printer properties → Ports → switch between USB001 and USB002 → Apply → test again.
Print Spooler hiccup:
Press Win + R → type services.msc → Enter → double-click Print Spooler → Restart → try a test page.
Why we recommend only this method
Right-clicking an .INF file to “Install” may add files to Windows, but it often doesn’t link the CAPT driver to the correct USB virtual port on Windows. The Have Disk method above sets everything up properly in one pass and is the most reliable approach for this printer.
A .INF file is a plain text file that contains information about how a program should be installed or configured on a computer. It is typically used for software installation on Windows operating systems. The file contains instructions for the installer, such as where files should be copied, registry keys that should be created, and other information needed to properly install the software. The file is usually included with the software package and is run when the user chooses to install the program.
Using the .INF file, you can install drivers on operating systems: Windows 11, Windows 10, Windows 8, Windows 8.1, Windows 7, Windows Vista, Windows XP (64-bit / 32-bit).
Quick guide to installing the driver: Right-click the INF file and select ‘Install’. Select ‘Yes’ to the User Account Control warning. A window will appear with the message: “The operation completed successfully”. You can select multiple INF files at once, then right-click on any of them and select ‘Install’.


best
The driver installation was successful
Thank you.
Thank you. The driver is installed and works well.
Very useful information and I’m very glad that my printer driver installed without any problems. Thank you very much.