Last Updated on 03.08.2025 by DriverNew
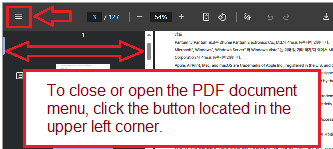 User Manual (PDF document)
Samsung Easy Document Creator is a user-friendly software tool designed for scanning documents and images with Samsung multifunction laser printers. It simplifies the process of digitizing physical documents and saving them in various formats for personal, office, or professional use. This guide explains how to install, configure, and use the software effectively.
Installing the Software
Before scanning, it is important to install two programs: Easy Printer Manager and Easy Document Creator. Both can be downloaded from the official support website. Visit the Software and Drivers section, enter your printer model, and download the latest versions listed under the Software tab.
Ensure your Samsung printer is properly connected to your Windows computer before proceeding.
Launching the Software
After installation, right-click the Easy Printer Manager icon on your Windows taskbar. If the icon is not visible, check the hidden icons section in the system tray.
Once Easy Printer Manager is open, select your printer from the left panel. Then click the scan option located in the Quick Links section. This will launch the Easy Document Creator software. If it does not open automatically, you may need to update or manually launch it.
Connecting the Scanner
If the scanner is not detected immediately, click the Search button inside Easy Document Creator to find connected devices. Once the scanner is recognized, you can begin configuring your scan settings.
Choosing Scan Type and Settings
Select the appropriate scan type depending on the document you are working with. Options include text documents, images, or specific formats like business cards.
Choose the paper size from the Size dropdown menu. Next, select the document source. Available options include Auto, Flatbed, and ADF (Automatic Document Feeder), depending on your printer’s hardware.
You can then select the desired resolution. The default setting is 300 dpi, which is suitable for most standard scans.
Adjusting Image Settings
For more control over scan quality, click the More Options button. This allows you to adjust image settings such as brightness, contrast, and sharpness before beginning the scan. After making the necessary changes, click the Scan button to begin scanning.
Saving the Scanned File
Once the scan is complete, you can configure how and where to save the file. Choose a file format from the available options, such as PDF, JPEG, or TIFF. Enter a file name and click the magnifying glass icon to choose the folder where the file will be saved.
Click Save. If prompted, you can choose whether to save the file again in a different location or exit after saving.
Exiting the Application
After saving your document, click the exit button in the top-right corner of the Easy Document Creator window to close the application.
Samsung Easy Document Creator is a practical and accessible tool for scanning with Samsung multifunction laser printers. Its simple interface and customizable settings make it suitable for home users and small businesses alike. By following the steps in this guide, users can scan, adjust, and save documents quickly and efficiently.


Leave a Reply