Last Updated on 30.06.2026 by DriverNew
 Operating systems: Windows 11, Windows 10, Windows 8, Windows 8.1, Windows 7, Windows Vista, Windows XP (64-bit / 32-bit)
Printer Model: Kyocera FS- 720
Kyocera Printer Driver
For Kyocera printers in Windows 11, 10, 8, 8.1, and 7, the best option is usually to install the KX Universal Printer Driver. This is Kyocera’s main universal driver, which is listed on the official website as the recommended print driver with advanced features. It is convenient to use instead of other Kyocera universal drivers, such as KX v4 and Classic Universal Printer Driver, because it provides good compatibility, easy installation, and access to the main device features. If the goal is to set up printing quickly and without unnecessary complications, the first thing to download and install is the KX Universal Printer Driver.
You can download the latest version of this driver from the official website or by using the following direct link:

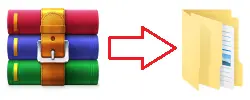
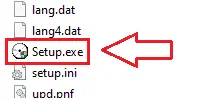
Installation is standard: download the ZIP archive, extract it to a separate folder, run Setup.exe as administrator, and follow the installation wizard prompts. If file name extensions are hidden in the folder and you cannot find Setup.exe, look for a file named Setup. It is the same file; Windows may simply have file extensions hidden.
If the program asks you to choose additional features during Express Install, for most users it is enough to enable printing a test page so you can immediately confirm that the driver is installed correctly and the printer is working. The other optional features are not required and can be configured later in Printer Properties if needed. If the device is connected over the network, it is usually more convenient to add it by IP address, because this often helps avoid automatic detection errors. After the installation is complete, it is a good idea to open Printer Properties in Windows, check the paper size and print quality, and set the device as the default printer if necessary.
One of the most common problems is that Windows does not detect the device automatically or installs it incorrectly. In that situation, it is better not to use automatic detection. Instead, run Setup.exe as administrator and, for a network connection, add the device by IP address. If the printer is installed but printing does not work correctly, some settings are unavailable, jobs are stuck in the queue, the device appears offline, or driver errors appear after a Windows update, remove the old driver, restart the computer, and reinstall the KX Universal Printer Driver. If that does not help, use this guide: How to Fix Problems That Cause the Printer or Scanner to Stop Working.
How to Install a Kyocera FS-720 Printer on Windows 11 x64 Using a Universal Driver
The old Kyocera FS-720 laser printer is a reliable device. However, the manufacturer did not release official drivers for modern 64-bit systems, including Windows 11. Trying to install a driver from similar models often causes the computer to display the message: “Printer status: Error”.
This problem occurs because the FS-720 is a GDI device. It does not have its own processor and depends entirely on the computer’s resources. If the driver sends incorrect commands, the printer freezes. In this article, we will explain how to install this printer using a universal driver from another model.
Method 1. Installation Using the KX Universal Printer Driver for the FS-920 Model (Recommended)
Experience shows that the modern universal driver released for the Kyocera FS-920 KX model works best for using the FS-720 printer on Windows 11 x64. It contains the required command architecture.
- First, remove the old non-working printer. Go to Windows 11 Settings — Bluetooth & devices — Printers & scanners. Select your printer and click the Remove button.
- Download the official universal driver package using the direct link from the Kyocera server:
https://www.kyoceradocumentsolutions.eu/content/dam/download-center-cf/eu/drivers/all/KX_Universal_Printer_Driver_zip.download.zip - Extract the downloaded ZIP archive. If you use the standard Downloads folder, the files will be extracted to the following path:
C:\Users\Core\Downloads\KX_UPD_8.6.1022\Kx86_UPD_8.6.1022_en_RC1_WHQL\ - Disconnect the printer’s USB cable from your laptop or computer.
- Press the Win + R keyboard shortcut. In the window that appears, enter the command
control printersand click OK. The classic window with the device list will open. - At the top of the window, click Add a printer.
- At the bottom of the window that appears, click the blue link The printer that I want isn’t listed.
- Select the last menu item: Add a local printer or network printer with manual settings. Click Next.
- In the Use an existing port field, select USB001 from the list, or a virtual printer port for USB. If there are several such ports in the list, select the port with the highest number, for example, USB002. Click Next.
- In the model selection window, click Have Disk…, then click Browse….
- You need to specify the path to the configuration file. Open the folder with the extracted driver, go to the
64bitsubfolder, and select theOEMSETUP.INFfile. The exact path to the file looks like this:
C:\Users\Core\Downloads\KX_UPD_8.6.1022\Kx86_UPD_8.6.1022_en_RC1_WHQL\64bit\OEMSETUP.INF
Click Open, then click OK. - In the model list, find and select Kyocera FS-920 KX. Complete the installation by clicking Next.
- After the installation has completed successfully, reconnect the printer’s USB cable to the computer.
Important tip: Modern computers use fast USB 3.0 ports. The old Kyocera FS-720 printer may work unreliably because of the high data transfer speed. If printing does not start, try connecting the cable to another USB port on your computer, preferably an older USB 2.0 port, which is black inside.
Method 2. Disable Driver Signature Enforcement
Older versions of the files inside the universal package may not have modern security certificates that Windows 11 strictly requires. Because of this, the security system may block documents from being sent to print, causing the Error status.
- Press and hold the Shift key on the keyboard.
- While holding the Shift key, open the Start menu, click the power button, and select Restart.
- The computer will restart into a special blue menu. You can now release the Shift key.
- Go through the following menu items: Troubleshoot — Advanced options — Startup Settings. Click Restart.
- After the restart, a list of numbered options will appear on the screen. Press F7 on the keyboard, or press the number 7. This will start the system with mandatory driver signature enforcement disabled.
- After Windows 11 starts, try sending a document to print again.
Method 3. Use a Virtual Machine (Guaranteed Option)
If the restrictions of the new Windows 11 x64 completely block the old device from working, you can create an isolated environment with an older operating system inside your computer.
- Download and install a free virtualization program, for example, Oracle VirtualBox.
- Create a virtual computer inside the program and install a lightweight 32-bit operating system on it. Windows 7 (32-bit) or Windows XP is a good choice.
- In the VirtualBox settings, enable USB passthrough for the USB port to which your Kyocera printer is connected, so that it is available inside the virtual system.
- Inside the virtual system, install the earliest original 32-bit driver for Kyocera FS-720.
- You will now be able to print any documents from this virtual machine without compatibility errors.
Driver for Kyocera FS- 720. This is a driver that will provide full functionality for your selected model.



Leave a Reply