Last Updated on 10.02.2026 by DriverNew
 This guide shows how to install the HP LaserJet P1006 printer driver on Windows 10 and Windows 11, and what to do if the driver will not install or the printer does not print.
Who this guide is for
- Printer: HP LaserJet P1006
- OS: Windows 11 or Windows 10 (usually 64-bit)
- Connection: USB
Note. The official HP driver file may look like this: ljP1000_P1500-HB-pnp-win64-en.exe. The file name can vary by language (for example, “en”), but the installation steps are the same.
Important tip about HP Smart: on older HP LaserJet models (including P1006), the HP Smart app may not detect the printer. This is normal. In that case, use the EXE installer (Method 1) or manual installation via INF (Method 2).
Download the driver (official HP page):
HP LaserJet P1006 – Drivers & Software
Direct link (if the HP page does not open):
ljP1000_P1500-HB-pnp-win64-en.exe
If the installer does not start or closes by itself: try a driver package for a different language/region. HP often provides files like …-win64-XX.exe, where XX is a language code. If your Windows is in a different language, downloading the matching language package can help.
Contents:
- Before you start (important)
- Method 1: install using the EXE
- Method 2: install using the INF (Have Disk)
- If something does not work
Before you start (important)
Warning: there are two different installation scenarios below. Do not mix the steps.
- If you install using the EXE (Method 1): do not connect the printer to USB in advance. Connect it only when the installer asks.
- If you install using the INF (Method 2): you can connect the printer earlier. If Windows shows “Found new hardware”, click “Cancel” and continue with the steps below.
General tips (for both methods):
- When it is time to connect USB, connect the printer directly to a USB port on the computer (no USB hub and no long USB extension cable).
- If the printer is not detected, try a different USB port and a different USB cable.
- If you already tried to install the driver and it did not work, remove old entries first (see below).
How to remove old entries:
- Windows 11: Settings → Bluetooth & devices → Printers & scanners → remove HP LaserJet P1006 (and similar P100x/P150x entries if they appear) → restart the PC.
- Windows 10: Settings → Devices → Printers & scanners → remove HP LaserJet P1006 (and similar P100x/P150x entries if they appear) → restart the PC.
If you see duplicate printers (for example HP LaserJet P1006_1, P1006_2), remove them too before reinstalling.
Method 1 (recommended). Install using the EXE
- Disconnect the printer from USB (if it is connected).
- Run the driver EXE (best: right-click → Run as administrator).
- Accept the license agreement and continue.
- When the installer asks, connect the printer to a USB port on the computer (no USB hub) and turn the printer on.
- Wait until the installation finishes.
- Open Settings → Printers & scanners and print a test page.
If everything installed and printing works, you are done.
Method 2 (universal). Install using the INF (“Have Disk”)
Use this method if the EXE installation fails, the installer closes by itself, or the printer is installed but does not print.
Inside the driver folder there is an INF file (example: HPLJP1005.INF). You need it if the EXE installer does not work.
2.1. How to extract the INF from the EXE
- Install 7-Zip or WinRAR (if you do not have it).
- Right-click the EXE → 7-Zip/WinRAR → Extract.
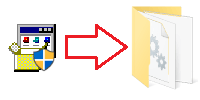
- In the extracted folder, find HPLJP1005.INF.
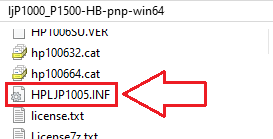
If file extensions are hidden and you do not see .INF, look for a file named HPLJP1005. It is the same file (Windows may hide “.INF”).
2.2. Install the driver using the INF
- Connect the printer via USB. If Windows shows “Found new hardware”, click “Cancel”.
- If Windows shows “Driver unavailable”, just continue — the next steps usually fix it.
- Open the printer settings:
- Windows 11: Settings → Bluetooth & devices → Printers & scanners
- Windows 10: Settings → Devices → Printers & scanners
- Click Add device.
- If the printer does not appear, click The printer that I want isn’t listed.
- Select Add a local printer or network printer with manual settings.
- Select port USB001 (or similar USB00x) → Next.
- Click Have Disk…
- Click Browse and select your INF file (for example HPLJP1005.INF).
- From the list, choose HP LaserJet P1006 → Next.
- Finish the installation and print a test page.
This video shows how to manually install a driver using “Have Disk…”
If something does not work (common problems and fixes)
Quick checks (before advanced steps)
- Restart the PC, then power the printer off and on.
- When you connect USB, connect directly to the PC (no USB hub).
- Try a different USB port and a different USB cable.
Problem 1. The printer is installed but does not print / jobs are stuck
Fix: restart the Print Spooler service. Official Microsoft guide:
Fix print spooler service errors
- Press Win+R → type
services.msc→ Enter.
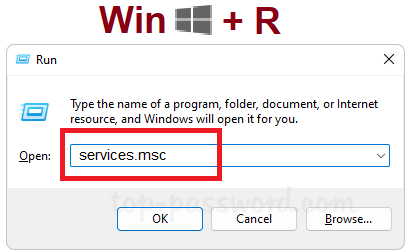
- Find Print Spooler → click Restart.
- Try printing again.
If jobs cannot be removed, you can clear the queue: stop “Print Spooler”, delete files in C:\Windows\System32\spool\PRINTERS\, then start the service again. Administrator rights may be required.
Problem 2. The EXE does not install / the installer closes by itself
Some users report that the installer may:
- close after 10–20 seconds without any message;
- close before reaching 25% progress;
- after that, Windows shows “Driver unavailable” or cannot find the driver when the printer is connected.
What to do:
- Disconnect the printer from USB.
- Run the EXE using right-click → Run as administrator.
- Connect USB only when the installer asks.
- If the installer still closes, use Method 2 (INF).
- If your Windows language is not English or the installer keeps failing, try a different language version of the driver package (see the download section above).
Problem 3. The driver cannot be removed / “driver is in use” / duplicates appear (for example P1006_1)
After multiple installation attempts, duplicate printers may appear (for example HP LaserJet P1006_1). Sometimes Windows refuses to remove the driver because it is “in use”.
Fix: deep cleanup and reinstall
- Disconnect the printer from USB.
- Remove all printer entries (including duplicates):
- Windows 11: Settings → Bluetooth & devices → Printers & scanners → remove HP LaserJet P1006 and HP LaserJet P1006_1 (if present).
- Windows 10: Settings → Devices → Printers & scanners → remove HP LaserJet P1006 and HP LaserJet P1006_1 (if present).
- Restart the PC.
- Press Win+R → type
printui /s /t2→ Enter.
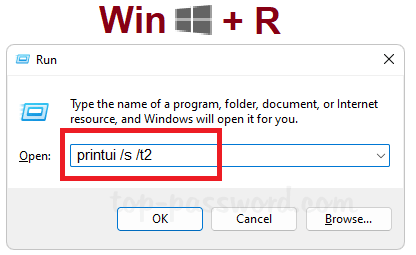
- The “Print Server Properties” window opens. Go to the Drivers tab.
- Find HP drivers (HP LaserJet P1006 / P1000 / P1500), select them and click Remove.
- If you see an option, choose Remove driver and driver package.
- If the driver still cannot be removed, restart the PC and repeat steps 3–7.
- After cleanup, install again:
- Try Method 1 (EXE) first and connect USB only when the installer asks.
- If it still fails, use Method 2 (INF).
Important: during manual installation, select USB001 (or USB00x). If you see a port like COM or Serial Port, it is usually the wrong choice for a USB printer.
Problem 4. The printer appears under “Other devices” in Device Manager
If the printer shows up in Device Manager under “Other devices” (or as “Unknown device”), the driver is not properly assigned.
Fix: install the driver using Method 2 (INF) and make sure the port is USB001 (or USB00x).
Problem 5. Windows says “A driver can’t load on this device” (more common on Windows 11)
Sometimes Windows blocks the driver because of security settings. Official Microsoft guide:
A driver can’t load on this device
Warning: disabling Memory integrity reduces system security. Do this temporarily and only if you cannot install the driver otherwise.
- Open: Windows Security → Device security → Core isolation.
- Temporarily turn off Memory integrity.
- Restart the PC.
- Install the driver again (best via INF).
Problem 6. The printer shows “Offline”
- Open Control Panel → Devices and Printers.
- Right-click the printer → Printer properties → Ports tab.
- Make sure the correct USB port is selected (for example USB001).
- Print a test page again.
Short summary
- First, try installing with the EXE (connect USB only when the installer asks).
- If it fails, install via INF (“Have Disk”).
- If the driver is stuck and cannot be removed, use
printui /s /t2→ Drivers tab → Remove driver and driver package. - If it does not print, restart Print Spooler.


Leave a Reply