Last Updated on 16.07.2022 by DriverNew
 Drivers and Software for Operating Systems: Windows 11, Windows 10, Windows 8, Windows 8.1, Windows 7 Vista XP / Mac OS / Linux
Printer Model: G&G M4100DW
Download and install Driver: G&G M4100DW. This software is intended to use all device functions. An additional software for the device is not required.
| Driver (Version) | Operating system | Download Driver |
| m4100 win.zip | Windows 11, Windows 10, Windows 8, Windows 8.1, Windows 7, Windows Vista, Windows XP (64-bit / 32-bit) | |
| GG IMAGE M4100 Series Mac Driver V1.0.3.pkg | Mac OS X 10.9 / 10.10 / 10.11 / 10.12 / 10.13 / 10.14 / 10.15 / 11 / 12 / 13 | |
| p4100 m4100 linus.zip | Linux Ubuntu 12.04 / 14.04 / 16.04 / 18.04 / 20.04 | |
| M4100DN/DW Firmware Upgrade Tool | Windows 11, Windows 10, Windows 8, Windows 8.1, Windows 7, Windows Vista, Windows XP (64-bit / 32-bit), Mac OS |
Recommended Usage Instructions: Start the software installation and follow the instructions on the screen.
G&G M4100DW
The User’s Guide contains information about setting up and using the device.
![]() Windows driver installation software provides two installing methods: one-click installation and manual installation. We recommend one-click installation, which can help to install driver automatically in a faster and more convenient way. The installation of this software is simple, convenient and hassle-free. This software is included with the device and is designed to enable you to use all the functions of the device.
Windows driver installation software provides two installing methods: one-click installation and manual installation. We recommend one-click installation, which can help to install driver automatically in a faster and more convenient way. The installation of this software is simple, convenient and hassle-free. This software is included with the device and is designed to enable you to use all the functions of the device.
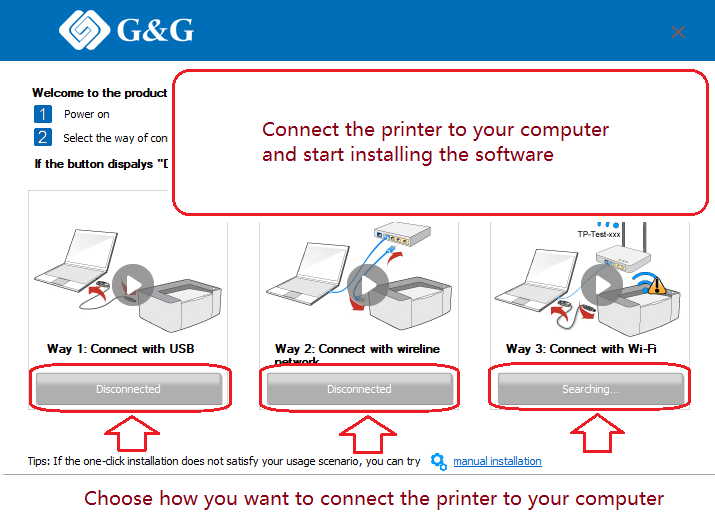
Connect the printer to your computer and start installing the software.
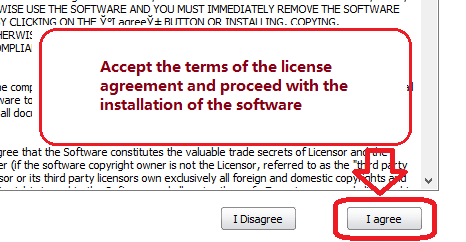
Installing the printer driver: Before starting the installation, extract the files from the archive and connect the printer to the computer. Use the file named ‘Autorun.exe’ to install the printer driver. Follow the instructions on the monitor screen. Accept the terms of the license agreement and proceed with the installation of the software.
 Choose how you want to connect the printer to your computer. Follow the instructions on the computer screen during the software installation process.
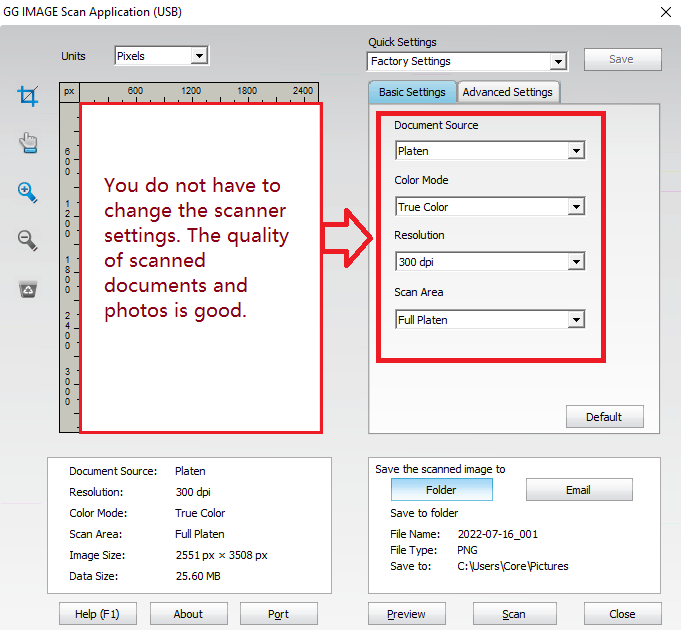
 If the printer is multifunctional and can act as a scanner, then after installing the software, a shortcut to this software will be created on the desktop of the computer. Click on this software shortcut to set up your scanner and scan documents.
 You do not have to change the scanner settings. The quality of scanned documents and photos is good.
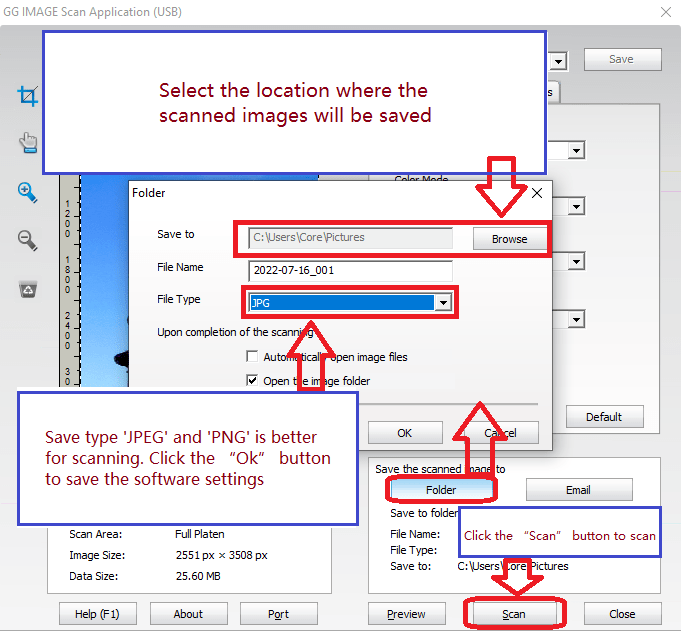
 Select the location where the scanned images will be saved. Save type ‘JPEG’ and ‘PNG’ is better for scanning. Click the “Ok” button to save the software settings. No other settings are required. Click the “Scan” button to scan. The software allows you to scan quickly and conveniently.


Leave a Reply